How to Add Syntax Highlighting to Code in Your Webflow Blog with Prism

You're a DevTools company or have an engineering blog, and you built your site on Webflow. The whole process was fast and easy, with no code involved.
But now, you're trying to write content targeted at developers, and it's a bit of a challenge. You can't find a way to add syntax highlighting to code directly in Webflow.
Don't worry. You won't have to write code in Google Docs (that was just for those annoying coding interviews in college). We'll show you a better way.
How to Insert Code Snippets Into Webflow CMS
You could always add your code as plain text. But that's ugly.
If you want to add code to your Webflow CMS, follow these steps:
➡️ Click on the + button in the editor.
➡️ Click on the "embed code" button.
 |
➡️ A dialog pops up. Enter your code here.
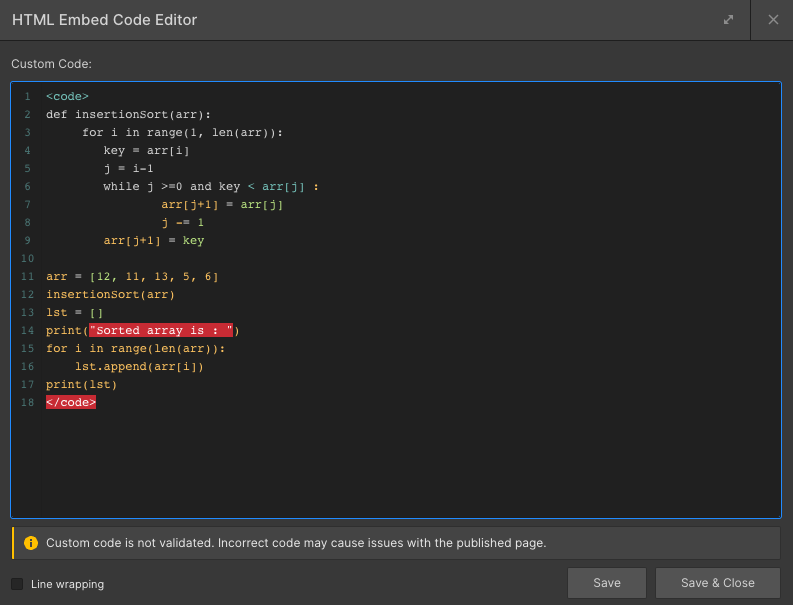 |
➡️ Use the <code> tag to wrap your code.
➡️ Hit "Save & Close."
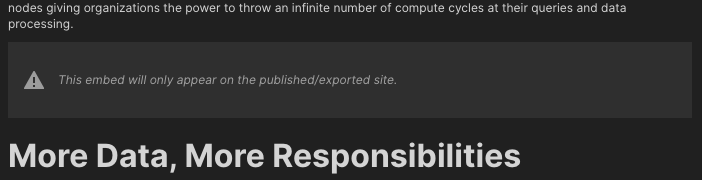
Note: You won't see your code right away. Instead, you get this block that says you'll see it once it's published (So... You just have to hit "Publish" and pray that it works 🤞).
 |
➡️ Once you publish your site and take a look, this is your result:
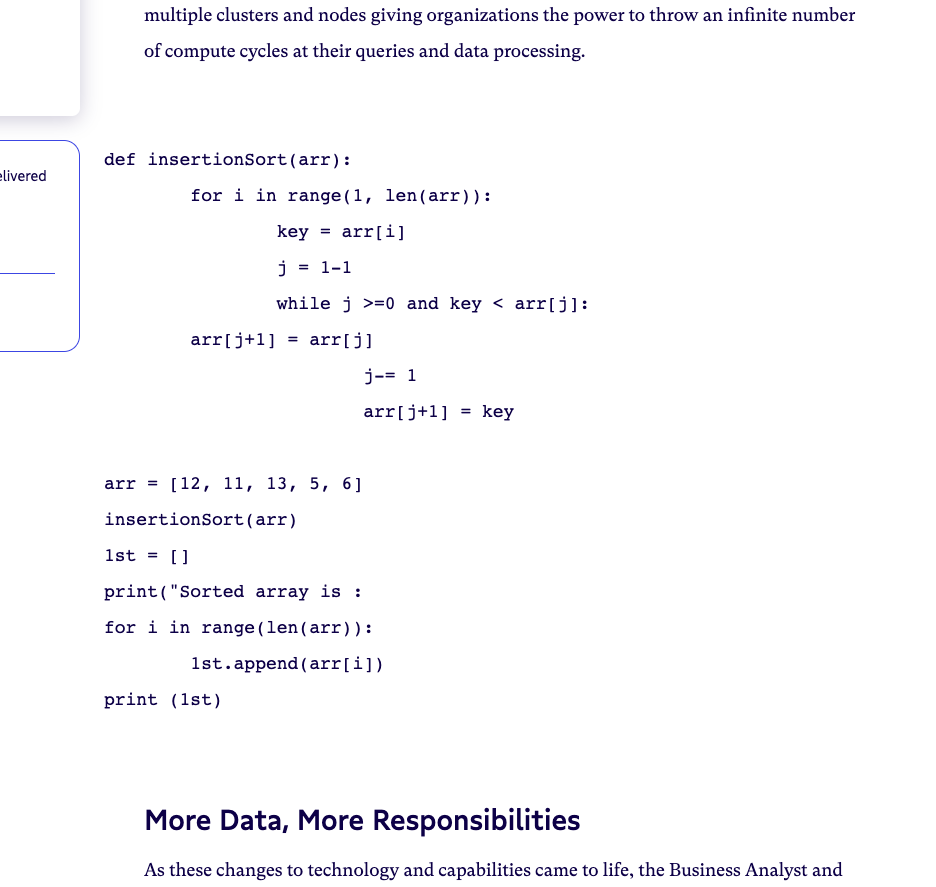 |
Yeah... I know. It leaves a lot to be desired. (Between you and me, I've seen garden gnomes that look prettier 😬).
Basically, inserting code this way is pretty bad for you and your reader. Here's why.
Why Is Inserting Code Snippets via Code Embeds in Webflow Bad for Readers?
If you're writing a blog for engineers, you want your code to be easy to read.
You need features like:
- Syntax highlighting for your language of choice
- CSS themes for your code block
- The ability to copy code snippets in one click
You want your code to look like something you'd see in professional developer documentation or an editor like VSCode or Sublime Text.
But inserting code snippers via code embeds in Webflow won't give you the quality you're looking for. The problem?
Illegible code is a pain in the butt for engineers to read. They'll spend more time analyzing your poorly formatted code than following your "how-to" guide.
Why Is Inserting Code Snippets via Code Embeds in Webflow Bad for Writers?
Writers of developer-focused content want features like:
- Markdown support
- An easy way to preview the code you're writing
- The ability to choose your programming language easily for syntax highlighting
Webflow doesn't natively support these features.
So, How Do You Improve Webflow Code For Readers and Writers?
- To improve the reader experience, add a library like Prism.js to your Webflow site
- There are others you might consider — like Highlight.js — but we're sticking to Prism in this tutorial. (Both options are free to use)
- To improve the writer experience, use Letterdrop — a CMS that lets you:
- Write your code in Markdown
- Select your language for syntax highlighting
- Preview the final results before publishing
- Automatically publish it to Webflow so that you don't have to deal with hacky code embeds
This guide walks you through how to do each one.
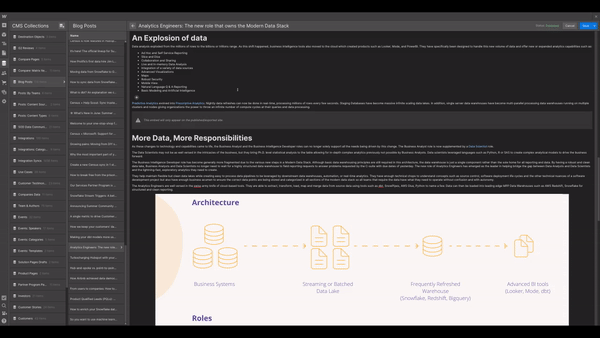
How Do You Install Prism.js on Your Webflow Site?
Step 1: Choose Your Prism.js Configuration
➡️ First, decide what kind of theme, language support, and features (like line numbers or copy/paste) you want in your final code.
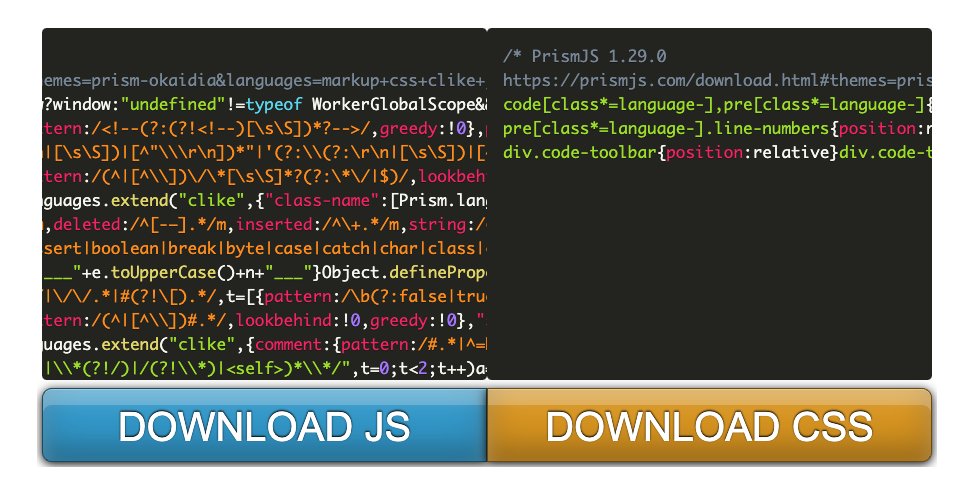
➡️ Visit the Prism.js Download page. You'll see options for the theme, languages, and features you want to support there.
➡️ Then, at the bottom of the page, you'll see buttons to download the custom JavaScript and CSS files tailored to your configuration. You can download and host these on your own CDN.
While this lets you reduce your file size, it's a lot of work.
We'll show you a shortcut.
 |
Step 2: Get the Prism.js Code for Your Configuration
➡️ Go to the CDNJS Prism library and copy URLs to the following:
- The minified Prism JavaScript (prism.min.js)
- The CSS of your favorite Prism theme (themes/prism-theme_name.min.css)
- Any Prism plugins (plugins/toolbar/prism-plugin_name.min.js)
 |
Note: As of November 2022, v1.29 is the latest version of Prism.js, but you can pick a newer version when you download it (if available). If you don't want to decide, we've included some good defaults in the next section.
Step 3: Install Code in Webflow
Put the CSS From Step 2 In <head>
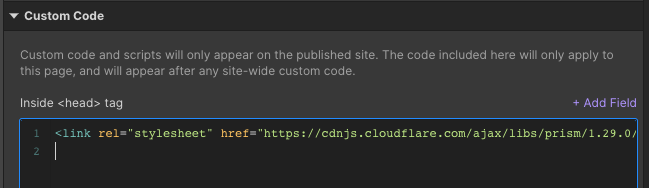
➡️ Grab your CSS CDN URL. We're going to use the Okaidia theme. You can just copy the code snippet below.
<link rel="stylesheet" href="https://cdnjs.cloudflare.com/ajax/libs/prism/1.29.0/themes/prism-okaidia.min.css"/>➡️ Open up the Webflow designer. Open "Pages" and then "settings" for the template page you want to use code in.
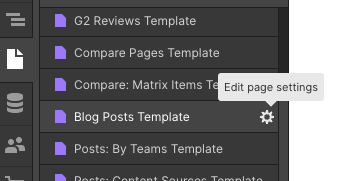 |
➡️ Scroll down to the "Custom Code" section and paste the above snippet into the field labeled Inside <head> tag like so:
 |
Put JS From Step 2 Before </body>
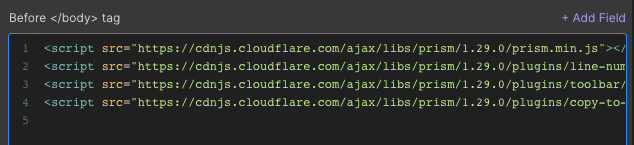
➡️ Grab your JavaScript CDN URLs. We picked a few for you below. We included the Prism.js library as well as some plugins for:
- Line numbers
- Unescaped markup to handle closing script tags in your code (it's an edge case)
- Copy to clipboard
- A toolbar (a requirement for "copy to clipboard")
<script src="https://cdnjs.cloudflare.com/ajax/libs/prism/1.29.0/prism.min.js"></script>
<script src="https://cdnjs.cloudflare.com/ajax/libs/prism/1.29.0/plugins/line-numbers/prism-line-numbers.min.js"></script>
<script src="https://cdnjs.cloudflare.com/ajax/libs/prism/1.29.0/plugins/toolbar/prism-toolbar.min.js"></script>
<script src="https://cdnjs.cloudflare.com/ajax/libs/prism/1.29.0/plugins/copy-to-clipboard/prism-copy-to-clipboard.min.js"></script>
➡️ Just copy the above code snippet if you don't want to think too hard about it.
➡️ In the same Webflow template settings under the "Custom Code" section, paste them in the Before </body> tag field.
 |
➡️ Now click "Save" on the top right.
➡️ Go ahead and publish your site to take this code live.
Voilà! You've installed Prism.js. 🎉
But you'll still have to modify your embed code a bit when you enter code like this:
<pre><code class="language-javascript">
...
</code></pre>
Instead of just wrapping your code in <code>, you also add a <pre> tag and class="language-{language of choice}" in the <code> tag.
Now, when you insert code, your output is significantly more readable. (I didn't include Python support or plugins in the below snippet, so it's a little plain).
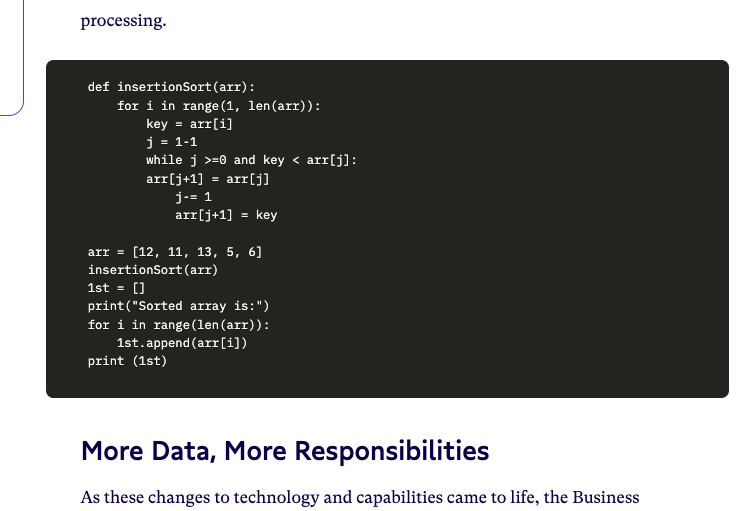 |
How Letterdrop Helps You Write Blog Posts in Webflow
Ok, so now your outputs are nice and pretty.
But writing this is still a pain in the butt. That's where Letterdrop comes in.
Letterdrop Makes It Easier to Add Code
Letterdrop CMS natively supports Markdown. Creating a code block is as simple as typing in three backticks. Letterdrop also natively supports Prism.js and syntax highlighting for all programming languages that Prism.js supports.
These features make it easier to read and write code snippets. Here's a summary of how to use them:
➡️ Select your language from the dropdown on the top right of a code block. (You can forget about those terrible <pre><code> tags!).
➡️ With the click of a button, you can preview your code. See what it looks like on your Webflow staging site (at webflow.io) instead of your live site. That way, you know what your final blog post will look like before it goes live.
Here's a quick demo:

Letterdrop's Editing Tool Helps Writing Teams
The Letterdrop editor natively integrates into Webflow, so you never have to use the Webflow editor... like ever
If you're someone in Marketing or Developer Relations, Letterdrop has everything you need in an editor — live collaboration, revision history, comments, suggestions, AI-assisted editing, Grammarly Business, and SEO optimization.
Letterdrop Draws Readers to Your Site
Letterdrop helps you establish a consistent publication schedule. It also redistributes your blog post to email and social channels like Twitter, LinkedIn, and Slack communities, as well as developer-focused blogging platforms like Hashnode and Dev.to.
That way, your helpful "how-to" coding guides can reach your target audience — no problem.
Takeaway
Adding code snippets natively in Webflow — and making them actually look decent — can be tricky. But it doesn't have to be.
With Markdown and Prism.js support, Letterdrop simplifies the process of adding syntax highlighting to code. We work with businesses that use Webflow for their sites and sell to developers like Census, Doppler, and Explo.
Even better, Webflow users get a free 14-day trial. Want to check us out? Book a demo with our team now.
Subscribe to newsletter
No-BS growth strategies and content marketing tactics in your inbox twice a month.
Related Reading
Some other posts you might find helpful